How to Install and Use the Netgear Nighthawk Router
The Netgear Nighthawk router is a powerful device designed to improve your internet connectivity and deliver faster speeds. Whether you’re streaming, gaming, or working from home, this router can make a big difference. However, to get the most out of your device, proper installation and configuration are essential. This guide will walk you through each step to set up and use your Netgear Nighthawk router efficiently, ensuring a seamless internet experience.
Getting Started with Your Nighthawk Router
Before diving into the setup, it’s important to prepare your router and understand the basics.
Unboxing and Checking Components
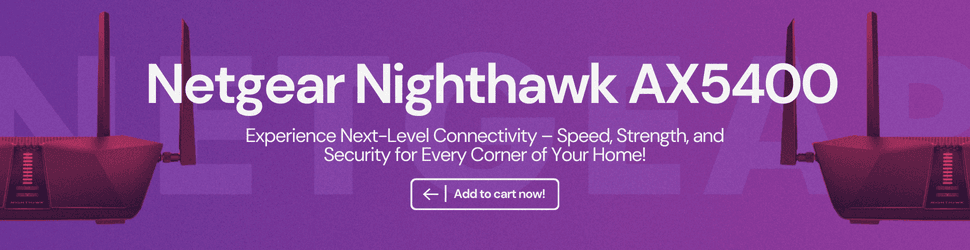
When you unbox your Netgear Nighthawk AX5400, ensure all components are present and intact. The box should include:
- The Nighthawk AX5400 router.
- A power adapter.
- Ethernet cables.
- A quick start guide.
Check for any physical damage to the components and ensure everything matches the package list. Missing or damaged parts can cause setup issues, so it’s best to resolve these before proceeding.
Selecting the Right Location
The placement of your router significantly impacts its performance. Choose a central location in your home to ensure even coverage. Avoid placing it near walls, large metal objects, or other electronic devices that might cause interference. A higher position, like a shelf, can help maximize signal strength.
Understanding Indicator Lights
Your router’s LED indicators provide important information about its status. These lights show whether the router is powered on, connected to the internet, or experiencing issues. Consult the user manual to understand the meaning of each light, so you can quickly identify any problems.
Installing the Netgear Nighthawk Router
Now that you’ve prepared the router, you can begin the installation process.
Connecting Hardware
- Start by connecting your modem to the Nighthawk router using an Ethernet cable. Plug one end into the modem and the other into the router’s WAN port.
- Connect the router to a power outlet using the provided adapter and switch it on.
- Wait for the indicator lights to stabilize. This ensures that the router is ready for the next steps.
Setting Up Using the Web Interface
The web interface allows you to configure the router directly from your computer:
- Open a browser and enter the router’s default IP address, usually 192.168.1.1 or routerlogin.net.
- Log in using the default credentials provided on the router or in the manual.
- Follow the setup wizard to configure basic settings such as network name (SSID) and password.
This method is straightforward and doesn’t require any additional apps.
Using the Nighthawk App
The Nighthawk app provides a convenient way to set up your router:
- Download the app from the App Store or Google Play.
- Open the app and follow the prompts to detect your router.
- Configure your Wi-Fi network name, password, and other settings as instructed.
The app also offers features like network monitoring and firmware updates.

Configuring Your Router for Optimal Performance
After installation, fine-tuning your router settings ensures better connectivity and security.
Setting Up Wi-Fi Networks
To protect your network, change the default SSID and password to something unique. This reduces the risk of unauthorized access. If you have visitors, consider setting up a guest network to keep your main network secure.
Updating Firmware
Regular firmware updates improve performance and fix security vulnerabilities. To update:
- Log in to the router’s web interface or open the Nighthawk app.
- Check for available updates and follow the prompts to install them.
Keeping the firmware updated ensures your router runs smoothly.
Adjusting Advanced Settings
Explore advanced features like parental controls and Quality of Service (QoS):
- Parental Controls: Manage internet access for specific devices.
- QoS: Prioritize bandwidth for streaming, gaming, or video calls.
These features enhance the router’s functionality and your overall experience.
Troubleshooting Common Issues
Even the best routers can run into problems. Here’s how to handle common issues.
Resolving Connectivity Problems
If your internet isn’t working or signals are weak:
- Restart your modem and router.
- Ensure all cables are securely connected.
- Check for interference from other devices or adjust the router’s placement.
Most connectivity problems are resolved with these simple steps.
Resetting the Router
If issues persist, a factory reset might help:
- Locate the reset button on the router.
- Press and hold it for about 10 seconds until the lights flash.
This will erase all custom settings, so you’ll need to set up the router again.
Contacting Netgear Support
If troubleshooting doesn’t resolve the problem, contact Netgear support. Have details like the model number and a description of the issue ready. You can also refer to the user manual or online forums for additional help.
Conclusion
Installing and using a Netgear Nighthawk router doesn’t have to be complicated. By following this guide, you’ll be able to set up, configure, and troubleshoot your router effectively. With proper placement, secure settings, and regular updates, your Netgear Nighthawk AX5400 router will deliver reliable and fast internet for all your needs.
Whether you’re streaming, gaming, or working, this router ensures a smooth and seamless online experience. Explore its advanced features to make the most out of your home network.
Share this content: