How to Set Up the Microsoft Surface Pro 9 in 5 Easy Steps
Setting up your new Microsoft Surface Pro 9 is a simple and straightforward process. By following these five easy steps, you’ll have your device ready for use in no time. This guide will walk you through each stage, ensuring a smooth and efficient setup experience.
Unboxing and Inspecting Your Surface Pro 9
After purchasing your Surface Pro 9, the first step is to unbox and inspect your device to ensure everything is in order.

Unboxing Your Device
Begin by carefully opening the box. Inside, you should find the Surface Pro 9, a charger, and any included accessories such as a keyboard cover or Surface Pen. It’s important to verify that all components are present to avoid any inconvenience later.
Ensuring that all items are included and undamaged sets a solid foundation for the setup process.
Charging Your Surface Pro 9
Before turning on your device, it’s advisable to charge it.
Connecting the Charger
Plug the charger into the Surface Pro 9 and then into a power outlet. Make sure the connection is secure to start charging.
Initial Charging Time
Allow your Surface Pro 9 to charge for at least 30 minutes before the first use. This ensures the battery is sufficiently powered for the setup process.
Turning On and Configuring Windows
Once your device is charged, you can proceed to turn it on and configure the Windows operating system.
Powering Up Your Device
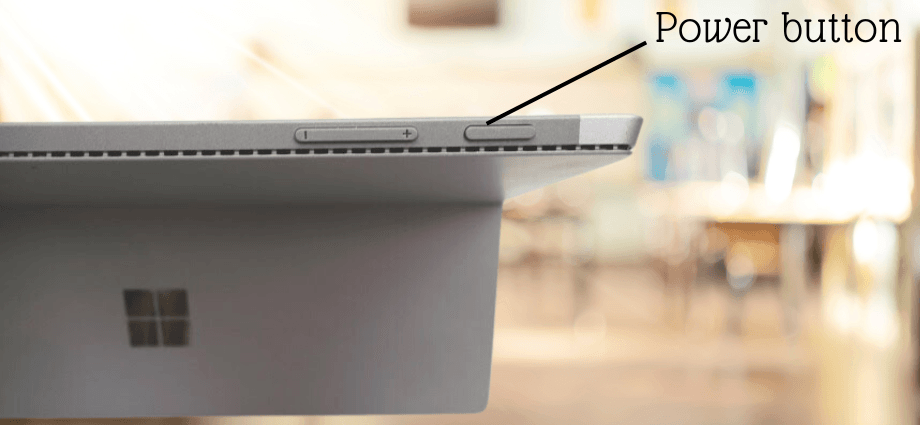
Start by turning on your Surface Pro 9.
First-Time Power On
Press and hold the power button until the Surface logo appears on the screen. This indicates that the device is booting up.
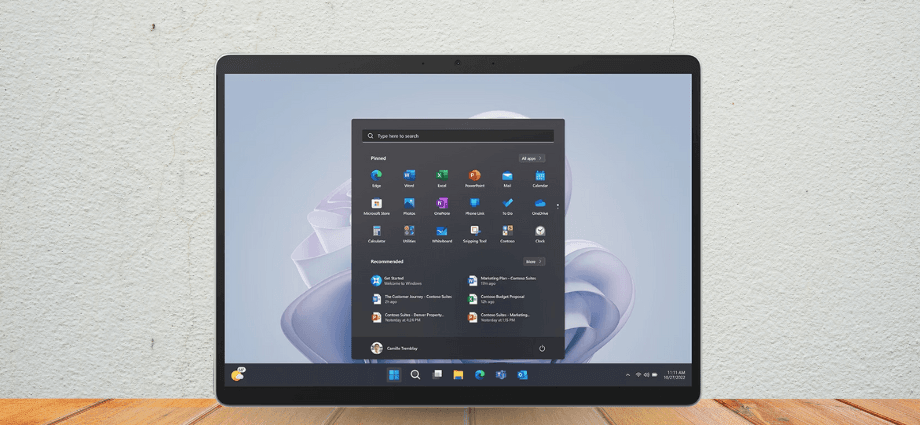
Initial Boot Process
During the first boot, your Surface Pro 9 will load the Windows setup process. This might take a few minutes, so be patient.
This step ensures that your device is ready for the initial configuration.
Connecting to Wi-Fi
Connecting to the internet is essential for completing the setup.
Selecting Your Network
Choose your Wi-Fi network from the list of available networks. Enter the password if required and connect.
Troubleshooting Connectivity Issues
If you encounter problems connecting to Wi-Fi, consider the following solutions:
- Restart your router.
- Verify that you’ve entered the correct Wi-Fi password.
- Move closer to the router to improve signal strength.
Setting Up Your Microsoft Account
Setting up your Microsoft account allows you to personalize your Surface Pro 9 and access Microsoft services.
Creating or Signing In to Your Account
You have the option to create a new Microsoft account or sign in with an existing one.
New Microsoft Account Setup
If you don’t have a Microsoft account, select the option to create one. Follow the on-screen instructions to enter your details and set up your account.
Signing In with Existing Account
If you already have a Microsoft account, enter your email and password to sign in. This will link your account to your Surface Pro 9.
Linking your Microsoft account is crucial for accessing personalized settings and Microsoft services.
Syncing Your Settings
Once signed in, you can sync your settings across devices.
Personalizing Preferences
Adjust settings such as theme, language, and layout to match your personal preferences. This makes your Surface Pro 9 more comfortable to use.
Enabling Security Features
Enhance your device’s security by setting up passwords, PINs, and biometric options like fingerprint or facial recognition for quick and secure access.
Installing Essential Applications
To make the most of your Surface Pro 9, install essential applications that enhance productivity and functionality.
Installing Microsoft Office Suite
The Microsoft Office Suite is essential for productivity tasks.
Accessing the Microsoft Store
Open the Microsoft Store from the Start menu. Search for Microsoft Office and select the appropriate version for your device.
Activating Your Software
After downloading, follow the on-screen instructions to activate Microsoft Office. This will enable you to use applications like Word, Excel, and PowerPoint.
Installing key applications ensures you have the tools needed for work and personal tasks.
Adding Additional Software
Beyond Microsoft Office, you might want to install other useful applications.
Consider installing the following apps to enhance productivity:
- OneNote: For note-taking and organization.
- Teams: For communication and collaboration.
- Edge Browser: For secure and efficient web browsing.
Regularly check for updates to keep your software up to date, ensuring you have the latest features and security patches.
Personalizing Your Surface Pro 9
Personalizing your Surface Pro 9 makes it uniquely yours and enhances your user experience.
Adjusting Display and Sound Settings
Fine-tune the display and sound settings to suit your preferences.
Optimizing Screen Brightness and Resolution
Adjust the screen brightness to reduce eye strain and set the resolution for clear visuals. You can do this in the Display settings.
Configuring Audio Preferences
Set up your audio preferences by adjusting the volume and selecting your preferred output devices, such as speakers or headphones.
Personalizing these settings ensures comfort and enhances the overall user experience.
Connecting Accessories and Peripherals
Enhance your Surface Pro 9 with various accessories and peripherals.
Pairing Bluetooth Devices
Connect Bluetooth devices like keyboards, mice, and headphones by turning on the Bluetooth device, going to Settings > Devices > Bluetooth & other devices, and selecting your device from the list to pair.
Using Surface Pen and Other Tools
If you have a Surface Pen, set it up by connecting it via Bluetooth, configuring pen settings in the Surface app, and customizing buttons and pressure sensitivity for optimal use.
Connecting accessories allows you to expand the functionality of your Surface Pro 9.
Conclusion
Setting up your Microsoft Surface Pro 9 is a simple process when broken down into five easy steps. From unboxing and charging your device to configuring Windows, setting up your Microsoft account, installing essential applications, and personalizing your settings, each step ensures your Surface Pro 9 is ready for use.
Share this content: